http://www.secondpicture.com/tutorials/3d/3d_modeling_of_a_human_head_3ds_max_01.html
I will be modifying this tutorial for my own use and character design as my character will not look exactly like this.
This tutorial provides an excellent pair of reference images that are carefully used during the tutorial in the front and right view.
The Mouth
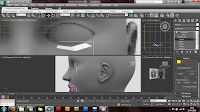
To begin, I created two planes to display the images as materials..
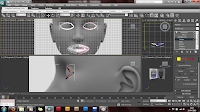
Next, I crafted the mouth by creating a small plane in the front viewport, adjusting the vertices also in the right viewport for the 3d structure
To create the mouth, the plane was converted to an editable polygon and one edge was extended repeatedly and positioned around the mouth line.
Whenever a new polygon was created, the vertices were modified to reflect a front and right view. This is important for shaping the model correctly.
Once half of the mouth was created I used a symmetry modifer to mirror the opposite side. This saves a huge amount of time and will be used on the entire model, it also provides an effective model shape on either side.
The Eyes
To create the eyes, a polygon was copied from the mouth section and positioned uderneath the eyesocket..


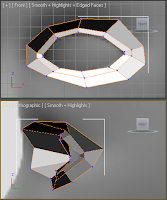
The same technique of extending a creating new polygons from the edge of the original polygon was used here to encircle the eye. (note the symmetry modifier creates the opposite eye socket)
 You can see here how the right view is used to create the ridge of the nose between the eyes as the eye socket polygons are extended to cover this.
*note - I will not be focusing too much on the detail of the eye sockets as I am planning to use sunglasses on my character.
 RSS Feed (xml)


No comments:
Post a Comment